Device configuration
What device configuration on the Hectare Mini is for, and how to prepare it — only the one device on the harness, the Agronomist level, the Sensors Configuration menu.
Every device on the sensor network answers on its own address. A seed sensor's address is the number of its row. A new or replaced sensor must get the right address before the panel can find it. This is device configuration, in “Service” → “Sensors Configuration”.
Prepare
Disconnect all sensors from the cable entry of the communication harness on the panel — the four-pin connector.
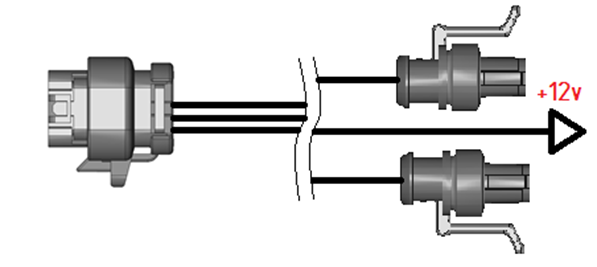
The cable entry of the communication harness: the four-pin connector, the harness and the power connection. Connect only the device that is to get a new address.
Switch the panel on. When it has started, it reports “Connection lost” for all the devices that are missing. Close the windows with “HOME”.
Raise the level to “Agronomist” — Enable the Agronomist level. For a HUB-8 concentrator or a tramline actuator raise it to “Service”.
Press “BACK” to return to the main menu. Select “Service” and press “MENU”.
Select “Sensors Configuration” and press “MENU”. The menu lists the devices that can be configured.
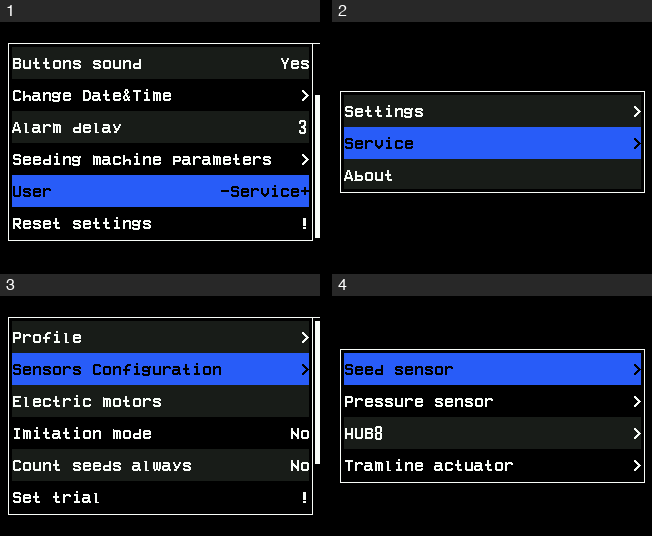
The way to the sensor configuration: Settings, the main menu, the Service menu, the Sensors Configuration menu.
| Item | Level | How |
|---|---|---|
| “Seed sensor” | Agronomist | Configure a seed sensor |
| “Pressure sensor” | Agronomist | Configure a pressure sensor |
| “HUB8” | Service | Configure a HUB-8 concentrator |
| “Tramline actuator” | Service | For the service engineer only. |
The rules of every configuration
- One device on the harness. With “Sensor address” at “AUTO” the panel takes the one device it finds. If more than one answers, it refuses with “More than one device in network!”; if none answers, it shows “No connection”.
- The new address must be free. When the device was picked by its present address instead of “AUTO”, the panel also checks the new one: if another device already uses it, it shows “Address: … is used!” with the number, and changes nothing.
- Any other refusal reads “Error #” with a number. Disconnect and connect the device, and try again.
- Check the result: disconnect the device, connect it again, and return to the home screen with “BACK”. The device must appear in its place, without a red cross.
Something your machine does that this page does not answer? Write to support@agriwelt.com — an engineer answers.