Check the profile and the connections
The first check after installing a Hectare Mini — does the profile match the machine, does every device answer, is every sensor under control — as a procedure with what the screen shows at each step.
The panel watches only the devices its profile lists. Systems are usually delivered with the profile already set, but before you set any parameter, check that it matches the machine and that every device answers. Checking the profile needs the “Service” level, which asks for a PIN — the dealer gives it for your panel; see Enable the Agronomist level. The other two checks need no code.
1. Check the profile
Connect all devices to the panel and power them as the wiring diagram in the data sheet of the system shows.
Switch the panel on. After the splash screen the home screen appears.
Raise the access level to “Service”: “MENU” → “Settings” → “User” → “Service”, “MENU”, PIN — as in Enable the Agronomist level.
Press “BACK”. The main menu returns, now with “Service”. Select “Service” and press “MENU”, then select “Profile” and press “MENU”. The profile menu opens.
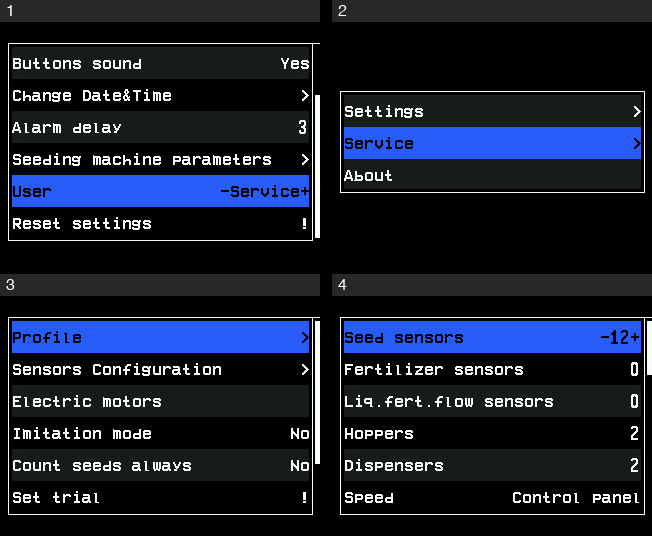
The way to the profile: Settings with the Service level, the main menu, the Service menu, the profile menu. Read the profile menu, from the top. Each item is one kind of device with the number the panel expects, for example “Seed sensors”; “Speed” shows how the speed sensor is connected: “Control panel”, “Input device” or “Input device (2)”. “UP” and “DOWN” go through the list, which is longer than the screen. All items: The profile.
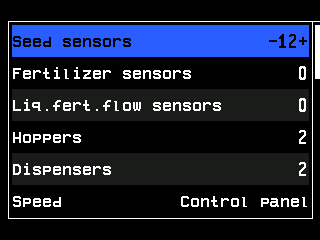
The profile menu. Compare the list with the machine and the wiring diagram. Change nothing here: “BACK” leaves the profile menu without saving.
Go back to the “Operator” level: switch the panel off and on, as in Enable the Agronomist level. At the “Service” level the panel shows no alarm windows, and the next check needs them.
If the profile does not match the machine, set it up first: Set up the profile.
2. Check that every device answers
Wait a few seconds on the home screen. If no window “Connection lost” appears, the panel has found every device of the profile.
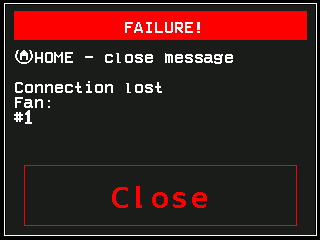
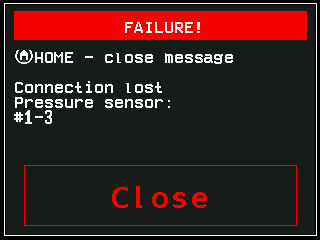
When several devices of one kind do not answer, one window lists all their numbers — here pressure sensors 1 to 3:
3. Check that every sensor is under control
A sensor out of control is not watched at all. Its indicator shows the blinking grey not-controlled sign, or !!!! in place of the value; under a diagram column it shows a white box with ! — see Indicators.
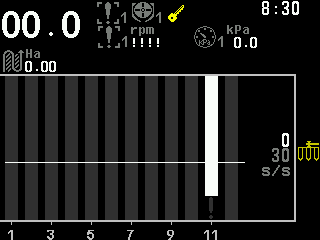
If there is such a sensor, take it into control:
On the home screen hold “MENU” until the speed indicator has a white background. The panel is in the sensor setup mode. Release the button.
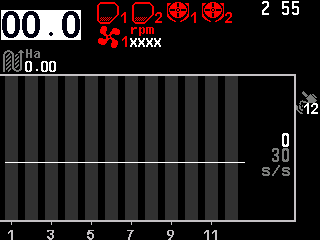
The sensor setup mode, the speed sensor selected. Press “DOWN” (or “UP”) until the sensor out of control is selected. A seed sensor is selected when its number under the column has a white background.
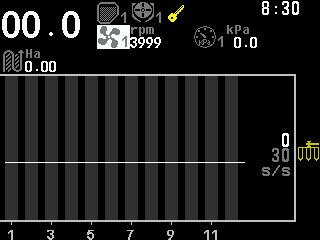
The fan sensor selected. Press “PLUS”. The panel asks whether you are sure; press “MENU” for “Yes”. “BACK” answers “No”.
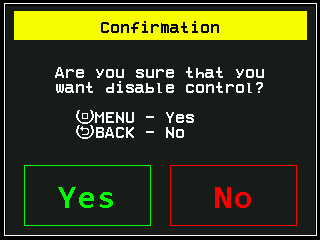
The question before the control of a sensor changes. Repeat steps 2 and 3 for every sensor out of control. The question comes only the first time while you stay in this mode.
Press “BACK” to leave the sensor setup mode.
Switching the control of a sensor on is what this manual calls taking a sensor into control. More: Take a sensor into or out of control.
The result
Every sensor must be under control, and no indicator may show a red cross — the sign of a device that does not answer.
When everything is right, the home screen shows every device in its normal grey, with no red cross and no not-controlled sign:
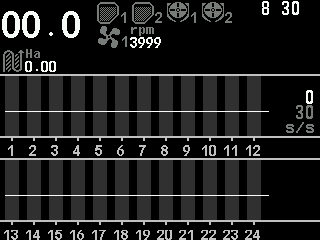
Then go on with the settings: Commissioning.
Something your machine does that this page does not answer? Write to support@agriwelt.com — an engineer answers.