Sensor settings
How to reach the settings of one sensor, what its context menu holds, and which calibrations exist.
Every sensor, actuator and motor on the machine has its own settings and its own status screen. Both are reached from the home screen. The parameters of each kind of sensor are in the topics that follow this one.
Reach a sensor
On the home screen hold “MENU” for a few seconds. The panel enters the sensor setting mode; the selected sensor is drawn inside a white rectangle.
Move from sensor to sensor with “UP” / “DOWN”. “PLUS” takes the selected sensor into control, “MINUS” takes it out — see Take a sensor in and out of control.
Press “MENU”. The context menu of the selected sensor opens.
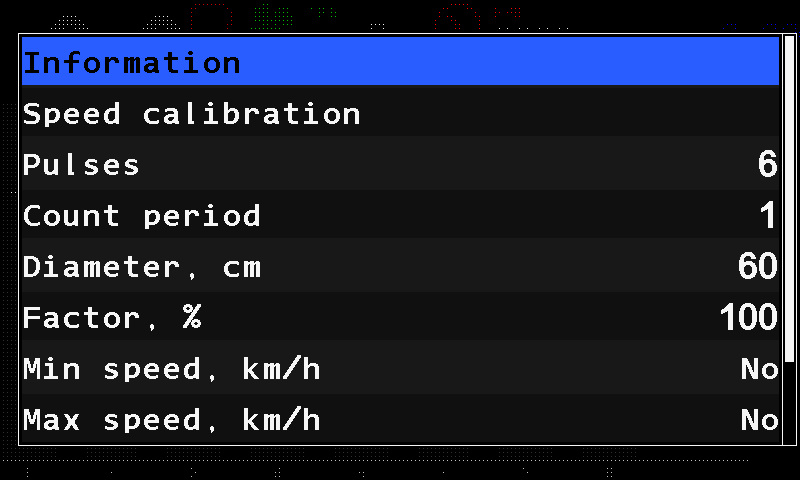
The context menu of the speed sensor. Press “BACK” to leave the mode.
Holding a sensor tile on the screen opens the same context menu directly.
The context menu
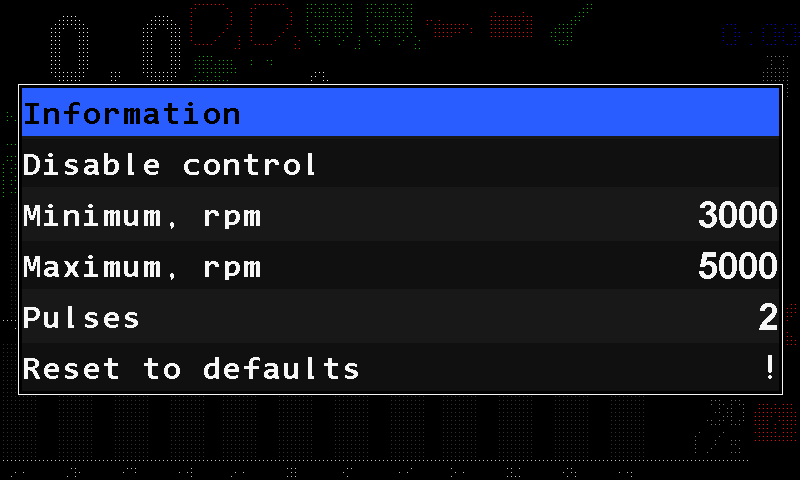
- “Information” — opens the status screen of this sensor. The sensor status screen.
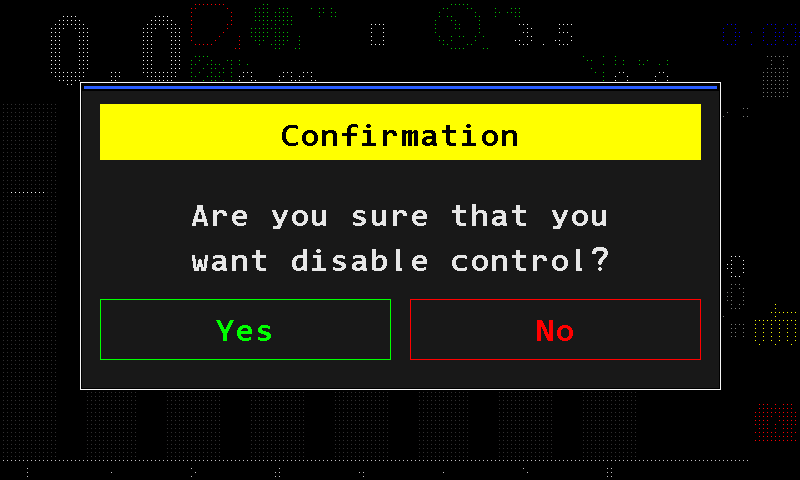
- “Disable control” / “Enable control” — takes the sensor out of monitoring, or back in. The first time in a session the panel asks for confirmation.
- The parameters of this sensor — here the three of a fan sensor. Which of them you see depends on the access level.
- The current value. Select the line; the value stands between – and + and changes with “MINUS” / “PLUS”.
- “Reset to defaults” — returns this sensor's parameters to the factory values. Service level only.
The status screen
“Information” opens the status screen of the sensor: its identity, its link, its live figures and its active alarms. How to read it: The sensor status screen.
Calibrations
Four calibrations exist. They are not variants of one procedure: each writes different parameters and is reached a different way.
| What it puts right | Where | Level | Machine |
|---|---|---|---|
| Travel speed — the pulses of the speed sensor over a known distance. Calibrate the speed sensor | “Settings” → “Seeding machine parameters” → “Speed calibration” | Agronomist | drives 100 m |
| Dispenser rotation — “Wheel, pulses” against “Dispenser pulses”. Calibrate the dispenser rotation | “Settings” → “Seeding machine parameters” → “Dispenser calibration” | Agronomist | wheel and dispenser shaft turned together |
| Dispenser mass — “Weight, gr” and “Weight, pulses”. Calibrate the dispenser by weight | context menu of the dispenser sensor | Operator | standing |
| Metering roller mass — “Weight, gr” and “Rotations” of one motor. Calibrate a metering motor by weight | context menu of the dispenser electric motor | Operator | standing |
The two menu calibrations need the “Agronomist” level, like the menu that leads to them. The two mass calibrations are at the “Operator” level, because they have to be repeated whenever the product changes.
Something your machine does that this page does not answer? Write to support@agriwelt.com — an engineer answers.