Configure a tramline actuator controller
Tell an actuator controller which tramline actuator it drives and which marker sensors are wired to it.
The actuator controller carries three things at once — the tramline actuator and the two marker sensors of the bout — and each has its own line. That is why one controller serves an actuator and both markers. Prepare first as in Device configuration: only this controller on the cable, “Agronomist” level.
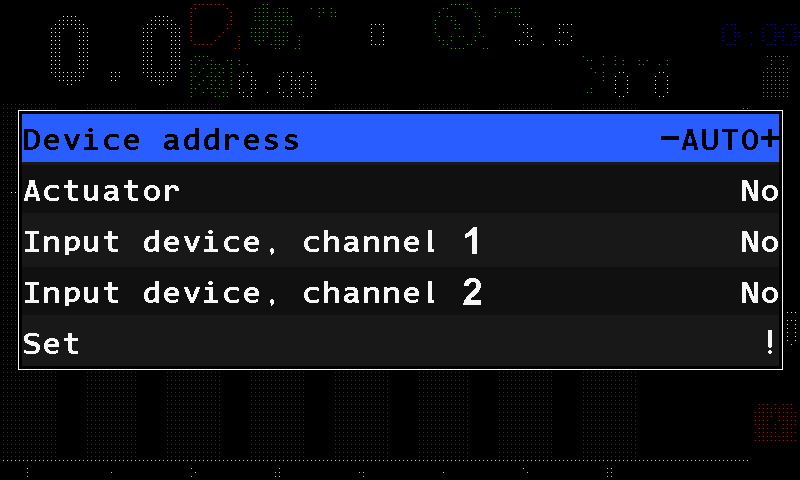
- “Device address” — which controller the menu talks to. Leave it at “AUTO”.
- “Actuator” — the number of the tramline actuator this controller drives, or “No” if it drives none.
- “Input device, channel 1” — the first marker sensor, or “No”.
- “Input device, channel 2” — the second marker sensor, or “No”.
- “Set” — writes the three lines to the controller.
Choose “Service” → “Sensors Configuration” → “Tramline actuator” and press “MENU”.
Leave “Device address” at “AUTO”.
Set “Actuator”, “Input device, channel 1” and “Input device, channel 2” with “PLUS” / “MINUS”.
Select “Set” and press “MENU”. The panel answers “Done”.
Disconnect the controller and connect it again. On the home screen, check that the actuator and the markers appear.
When all devices are done, set the level back to “Operator”, or switch the panel off and on. The actuator's own settings: Tramline actuator; the markers: Marker sensors.
Something your machine does that this page does not answer? Write to support@agriwelt.com — an engineer answers.