Menus, context menus, number pad and windows
The five things everything on the panel is done through — working screens, the main menu, the context menu of a device, the number pad, and the windows that ask or tell.
Everything on the panel happens through five things: the working screens, the main menu, the context menu of a device, the number pad and the windows that ask or tell you something. The working screens have their own topic: Working screens.
The main menu
Press “MENU” on the home screen, or tap the screen with two fingers. The main menu opens over the home screen.
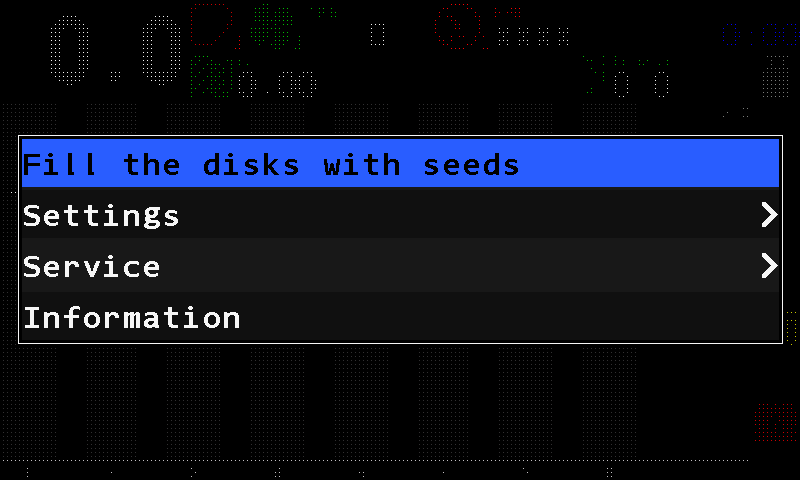
- Selected item. Black text on a light blue band. “UP” and “DOWN” move the band; “MENU” enters the item. Here “Fill the disks with seeds” — see Fill the disks.
- “Settings”. The settings of the system and of the machine. See The Settings menu.
- Arrow head. The item opens another menu.
- “Service”. Commissioning and service items. See Service menu.
- “Information”. Opens the screen with the information about the system.
In any menu, an item is read by what stands on its right:
| What you see on the right | What it means |
|---|---|
| An arrow head | The item opens another menu. Press “MENU”. |
| A value between - and + | Change it with “PLUS” and “MINUS”, right there in the list. |
| A value between -[** and **]+ | “PLUS” or “MINUS” opens the number pad. |
| Nothing | The item performs an action. Press “MENU”. |
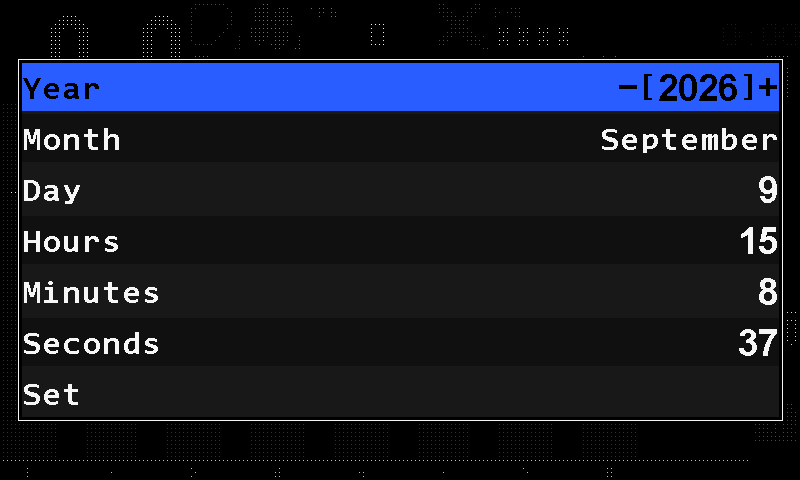
“BACK” leaves a menu and returns one level up.
The context menu of a device
Every sensor, motor and indicator on the home screen has its own menu. Touch and hold the device — its icon or its column on the diagram — and its context menu opens. On the Motors screen and on the second home screen the same works for a motor tile.
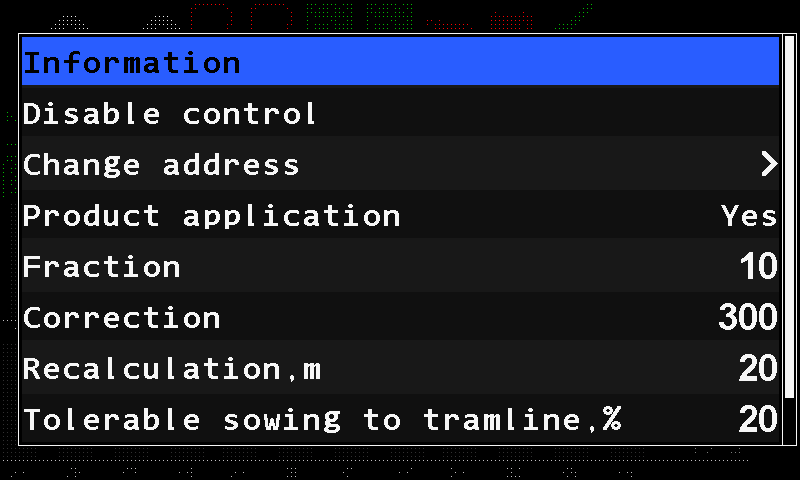
The first item, “Information”, opens the status screen of the device. The second switches its control: “Disable control” or “Enable control” — see Take a sensor into or out of control. Below them stand the parameters; which ones you see depends on the access level (Access levels).
Entering numbers
When a value is written between square brackets, changing it opens the number pad.
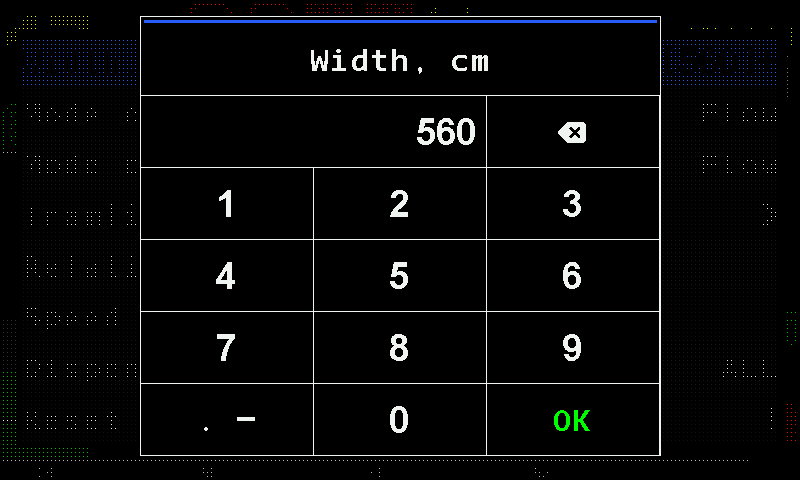
- Name of the parameter. Here “Width, cm”.
- Value. What you have typed so far.
- Backspace. Deletes the last digit. Touch and hold it to clear the whole value.
- Digits. 1 to 9 and 0.
- Decimal point and minus. A touch adds the point; touch and hold switches the minus sign, where a negative value is allowed.
- Zero.
- “OK”. Accepts the value. “MENU” does the same.
A value outside the permitted range is not taken as typed: the panel sets the nearest limit instead.
Windows that ask, and windows that tell
Every window has the same shape: one box in the middle of the screen, a coloured strip along its top with a word in it, the message under the strip, and the buttons — if any — along the bottom. Read the strip first:
| Strip | What kind of window | How it closes |
|---|---|---|
| Yellow, “Confirmation” | The panel asks. Nothing happens until you answer. | Touch “Yes” (green) or “No” (red). “PLUS” answers yes, “MINUS” no, “BACK” cancels. |
| Blue, “Information” | The panel tells you what happened. | Some close by themselves; others close with a touch, “PLUS” or “BACK”. |
| Red, “FAILURE!” | An alarm. | See below. |
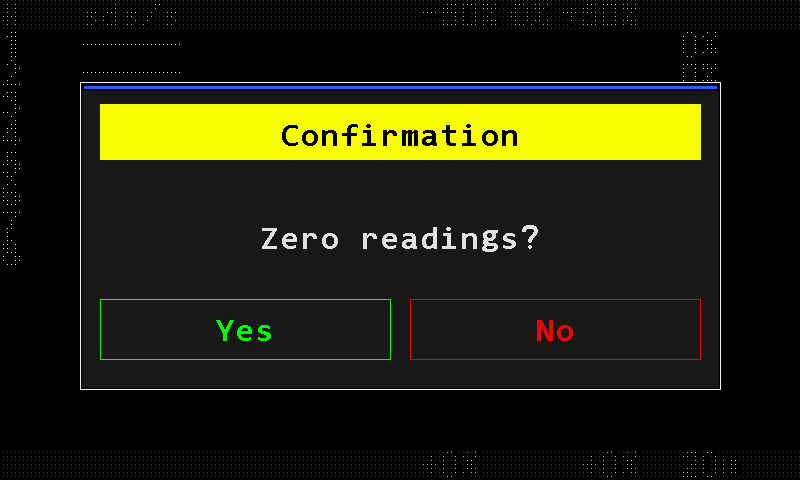
The information window below closes by itself.
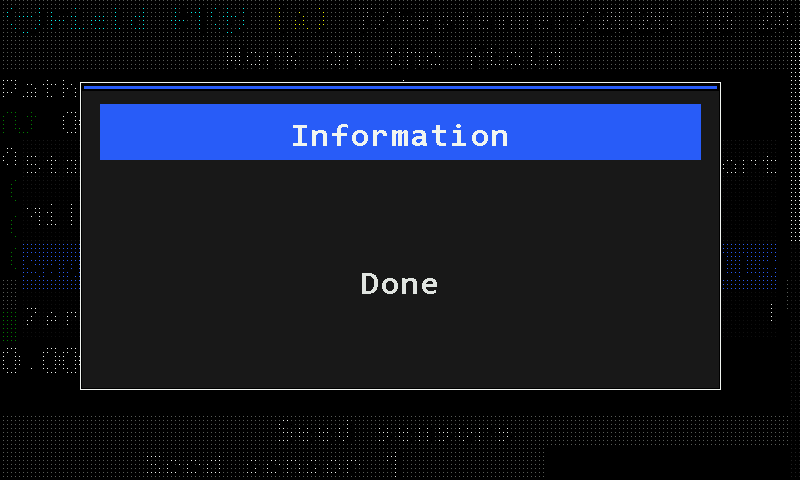
Alarm windows
An alarm window says what happened, on what kind of device, and which devices — their numbers are listed when several identical sensors report the same fault at once. While it is open, the panel beeps.
| What you do | What happens |
|---|---|
| Touch “Close” in the window, or press “HOME” | This alarm closes. The next one in the queue appears. |
| Hold “HOME” | The window closes and the panel returns to the home screen. |
The other six buttons are dark and do nothing while an alarm window is open.
Something your machine does that this page does not answer? Write to support@agriwelt.com — an engineer answers.