Device configuration — before you start
What device configuration is, the preparation it needs, and the three-item pattern every configuration menu follows.
When a system is commissioned, or a sensor is replaced, each new device must be given its address — the number by which the panel finds it on the sensor network. That is done in “Service” → “Sensors Configuration”, one device at a time.
Prepare
Disconnect every sensor from the network connector of the panel.
Connect only the one device that is to be given a new address.
Switch the panel on. Alarms about lost communication appear — close them all (How alarms work).
Raise the access level to “Agronomist” — see Enable the Agronomist level.
Press “BACK”, then choose “Service” → “Sensors Configuration”. The menu offers four kinds of device.
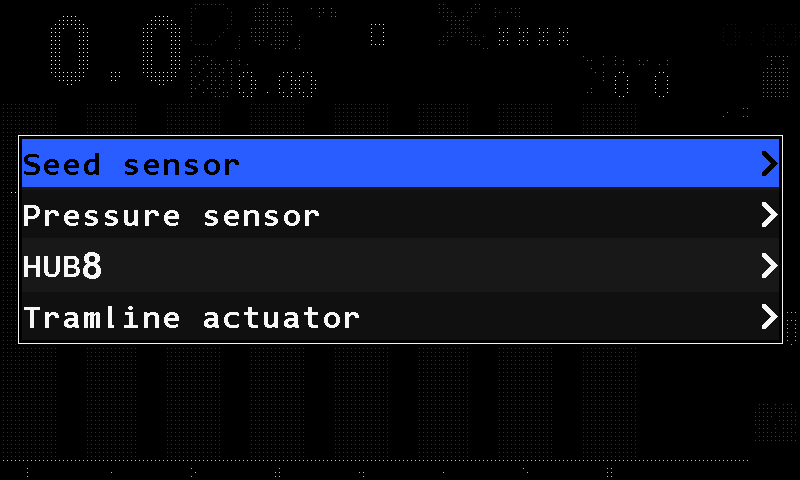
The “Sensors Configuration” menu.
The pattern
All four menus work the same way:
| Item | What it is |
|---|---|
| “Sensor address” / “Device address” | Which device the menu talks to. Leave it at “AUTO” and the panel talks to the single device that answers. Pressing “MENU” on this item starts a search; each further press steps to the next device found. |
| “New address” | The address the device is to take. Set it with “PLUS” / “MINUS”. |
| “Set” | Writes it. “Done” means the device has accepted it. |
Afterwards, every time: disconnect the device and connect it again, return to the home screen and check that it appears where it should. Then set the level back to “Operator” — or switch the panel off and on, which does the same.
The devices
| Device | Topic |
|---|---|
| Seed sensor | Configure a seed sensor |
| Pressure sensor | Configure a pressure sensor |
| HUB8 input device | Configure a HUB8 |
| Tramline actuator controller | Configure a tramline actuator controller |
| Electric motor controllers — their own way in | Configure the motor controllers |
Something your machine does that this page does not answer? Write to support@agriwelt.com — an engineer answers.