Dispenser electric motor
The parameters of an electric metering motor — gear ratio, direction, speed window, product, calibration figures and the calibration button.
An electric motor drives a dispenser at the speed the panel works out from the target rate and the travel speed. Open its context menu as in Sensor settings.
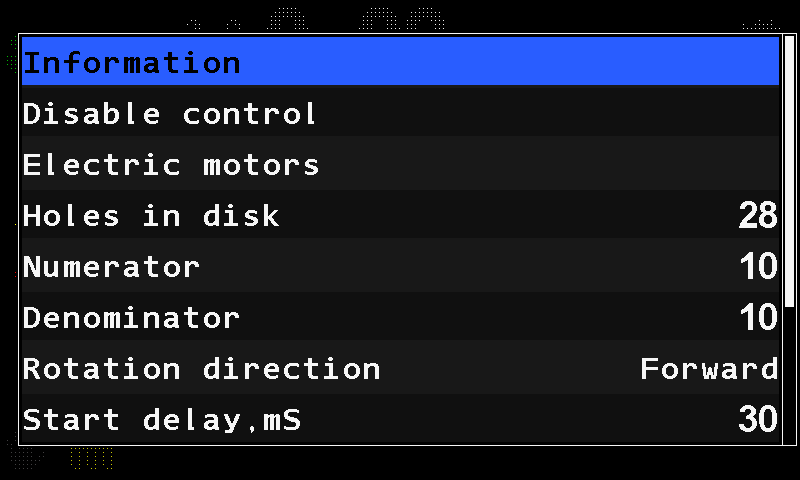
| Parameter | What it does | Range | Level |
|---|---|---|---|
| “Holes in disk” | “Precise” mode only. | 1 … 200 | Operator |
| “Numerator” / “Denominator” | Together: the gear ratio between the motor and the dispenser shaft. | 1 … 500 each | Agronomist |
| “Rotation direction” | The direction the motor turns. Set it so that the dispenser turns the right way for how the motor is fitted; default “Forward”. | “Forward” / “Backward” | Agronomist |
| “Rollback when jammed” | Back the rotor off and try again instead of stalling. | “No” / “Yes” | Agronomist |
| “Section control D.I.” | Lets a switch on the section-control input of the motor controller stop this motor: “Shut off(0)” stops it while the input reads 0, “Shut off(1)” while it reads 1; “No” ignores the input. | “No” / “Shut off(0)” / “Shut off(1)” | Service |
| “Start delay,mS” | The shortest time between the start of one metering motor and the next: a motor that would start sooner waits, so the motors start one after another. Default 30 ms. | 0 … 500, steps of 5 | Service |
| “Group start address” | Set at commissioning — see Device configuration. | Service | |
| “Type of product” | Which of the four products this motor meters. | Agronomist | |
| “Weight, gr” / “Rotations” | Both set by the calibration by weight. | 1 … 65535 each | Agronomist |
| “Minimum, rpm” / “Maximum, rpm” | The shaft speed window the panel may use. | 0.1 … 500.0 each | Agronomist |
| “Button input” | Digital input of the motor controller used as a calibration button; “No” = none. | No, 1 … 3 | Agronomist |
| “Activation signal” | Which state of that input counts as pressed. | 0 / 1 | Agronomist |
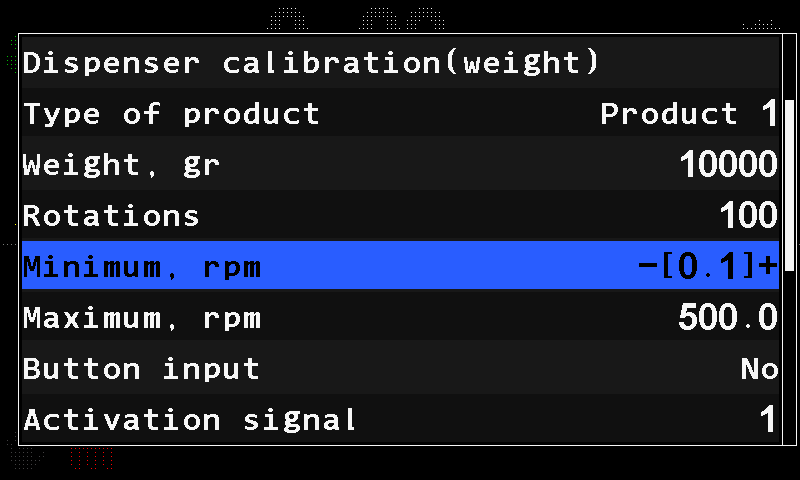
“Minimum, rpm” and “Maximum, rpm” are not a safety limit but the window the rate control works in. The dosing speed window on the calibration screen is worked out from them together with the roller figures. “Button input” and “Activation signal” let one person start the motor from the dispenser during the calibration — see Calibrate a metering motor by weight.
The status screen shows “Working” or “Faulty” and the last fault code (Read the fault code of an electric motor). Alarms: Metering motor alarms, Dosing by weight. The controller itself is set up in Configure the motor controllers. “Electric motors” in the context menu (“Service” level) opens the Motors screen on this motor — the same screen as “Service” → “Electric motors” (Motor controller diagnostics).
Something your machine does that this page does not answer? Write to support@agriwelt.com — an engineer answers.